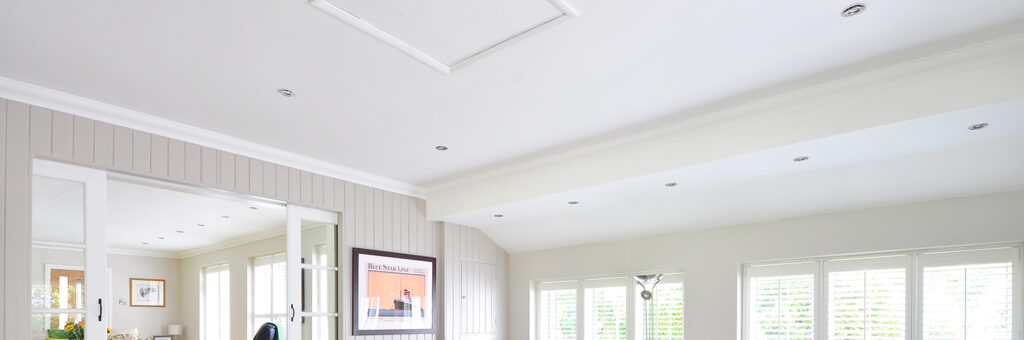
How many walls are there in the average room? Obviously the answer is four. But, if we stretch the definition of wall a little bit, we could make an argument for five, because there’s always the ceiling to consider. It doesn’t always have to match the vertical walls, granted, but it still has a very important role to play in complementing the walls with the introduction of light and space into a room.
Dark colours on the walls would be fine, but you may well need a contrasting light colour for the ceiling to prevent the room from simply becoming a dark box. Naturally, it works the other way as well, and you may want a darker ceiling to offset the walls. Or, you may lean towards light, bright shades all round.
However you want your room to look, the ceiling should not be overlooked. Getting a good quality paint that’s appropriate for the job is key. For one, it’s a horizontal surface affected by gravity far more than comparative paintable surfaces, so ceiling paint has to be the right consistency, as well as having a strong enough finish to stand out. Here’s our rundown of the best choices for ceiling paints available for you to buy today.
| Name | Coverage | Dry Time | Cost |
|---|---|---|---|
| Johnstone’s Wall and Ceiling Paint | 12 m2 /l | 4 hours | £ |
| Dulux Once for Walls and Ceilings | 11 m2 /l | 4 hours | ££ |
| Polycell Crack-Free Ceilings | 8 m2 /l | 3 hours | ££ |
| Leyland Trade Vinyl Matt | 14 m2 /l | 4 hours | ££ |
| Dryzone Anti Mould | 12 m2 /l | 3 hours | £££ |
Johnstone’s Wall and Ceiling Paint
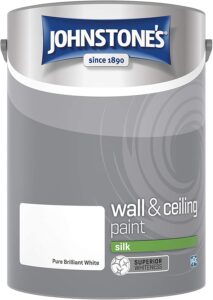
Johnstone’s continue with their fine tradition of excellent quality household paints at remarkably affordable rates. This silk finish paint, with more of a brighter glossy sheen to it, is the one stop shop for big surfaces indoors as it’s designed for walls as well as ceilings. a staggering 39 different colours can be chosen from to give you a massive amount of freedom in mixing and matching colours you create your perfect aesthetic.
Being a paint with a water base, not only is it very quick to dry but also very low odour, which marks it as a user-friendly choice for home decorating. Johnstone’s also promise a long-lasting finish with this paint, really maximising the value of either the 2.5 or 5-litre tubs. Once dry, the silk finish is also very durable and easy to clean, perfect in the event that stains do start to appear on your ceiling.
Pros
- Excellent value
- Lots of colours
- Easy to clean
- Silk finish
Cons
- May need multiple coats
Dulux Once for Walls and Ceilings
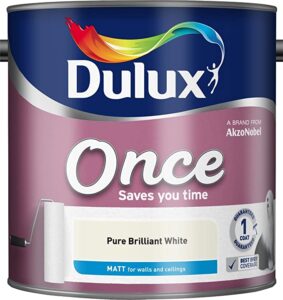
‘Saves you time’ proclaims the tin for Dulux’s Once paint range. It promises to do so by requiring just one coat of paint to get excellent coverage from top to bottom (well, one side to the other for a ceiling). It also saves you time by drying in roughly 4 hours, allowing you to get on with DIY tasks unimpeded. While one coat is all that should be required, more may be needed should you want a bolder finish.
Dulux offers 8 colour variants in this range, all coming in a matt finish. It’s delightfully understated but nonetheless offers bold colour, with a good range of neutral tones to choose from as well as couple of much more vibrant options. Another big advantage to the paint is its low odour, making it exceptionally easy to work with.
Pros
- One coat
- Lots of colours
- Smooth finish
- Low odour
Cons
- Thick to work with
Polycell Crack-Free Ceilings
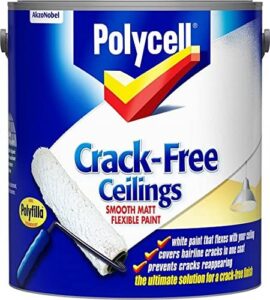
Polycell are perhaps more well-known for their range of caulks and fillers under the Polyfilla moniker. These are most famous for being able to nigh-on miraculously fill in unwanted cracks and holes in DIY applications, and its that functionality that has been transferred across to their line of paints. This crack-free ceiling paint combines the best of both worlds, with paint that leaves a great, smooth finish while filling in even the tiniest of hairline cracks in the process.
A bright white paint in a lovely, even matt finish, this paint is also designed to flex with your ceiling as they naturally do with changes in temperature. The protective element of the paint also extends to preventing future cracks from appearing as well as filling in existing ones, ultimately leaving you with a finish that’s like new. Once applied, leave it 2-3 hours to achieve touch dryness, but if a second coat is needed it needs to be left overnight to fully dry. It’s also pretty reasonable value for a paint with such restorative powers.
Pros
- Fills in and prevents cracks
- Great finish
- Decent value
Cons
- Only white available
Leyland Trade Vinyl Matt
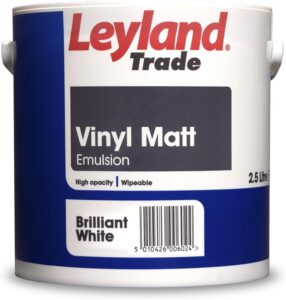
Leyland Trade are a very-well established brand in the world of building trade, and so it’s fair to assume that if their products are suitable for the professionals, they’ll be more than suitable for the home DIY enthusiast as well. This vinyl matt emulsion, designed for use on walls and ceilings, is a great choice that provides excellent coverage and a smooth finish.
Thanks to high-opacity pigments in the paint, the strength of colour in the dried paint is considerable. They offer 9 different shades, all falling within the spectrum of neutral household shades, to give you a good amount of flexibility in subtly matching and/or complementing your walls. The matt finish is also designed to help hide any imperfections in the ceiling itself, as sometimes it’s not always necessary to use a filler. It’ll dry ready for a second coat in 2-4 hours, but in many cases may not need a second as the consistency of the paint offers great coverage.
Pros
- Dries quickly
- Great coverage
- Hides imperfections
- Low odour
Cons
- A little prone to yellowing
Dryzone Anti Mould

Water stains in the ceiling are an unfortunate eventuality for many homes. This is due to the fallible nature of water pipes running through the house, which can sometimes cause damp and mould. Dryzone’s Anti Mould paint aims to tackle this head-on with a specific formula to combat black mould and dampness. Available in magnolia or white, the paint actively resists the growth of mould and can stand up to even persistent condensation.
Dryzone guarantee this protection for 5 years. Add to that a quick-drying formula that, once a couple of coats have been applied and allowed to fully dry, is fully washable and easy to maintain, and you have a great option for households prone to damp issues. It’s very low odour, and while a bit pricier than other ceiling paints, is surely worth it for the guaranteed mould protection.
Pros
- Damp and mould resistant
- Long life protection
- Dries quickly
- Easy to clean
Cons
- Expensive
Which Ceiling Paint Paint To Go For?
The right ceiling paint is the figurative, and almost literal, cherry on top of a well decorated room. It helps to bring the walls together, and is an instrumental part of lighting a room – it’s primarily responsible for reflecting the light of ceiling bulbs around the room. To help better inform your buying choices, here’s our pick for both best overall ceiling paint as well as the best value choice.
Best Ceiling Paint – Overall, Polycell Crack-Free Ceilings offers the best choice for ceiling paint. It has a fantastic finish that’s capable of renewing your ceiling by helping to fill in even the tiniest hairline crack. It also promises to cover stains, and all at a very reasonable price to boot.
Best Value – If it’s great value you’re after, then Johnstone’s Wall and Ceiling Paint is your best bet. Put simply, they offer you a lot of high-quality paint at a remarkably affordable rate. It has a lovely silk sheen, a vast array of colours, dries quickly and offers long-lasting coverage.
Ceiling Paint FAQ
How to paint a ceiling
Painting the ceiling should be your first job if you’re fully renovating a room, so that it doesn’t drip onto everything else and ruin your hard work. Once all furniture etc is removed, place a dust sheet down or something to protect the floor. Next, cut in the edges of the ceiling using a medium-width brush. Then, using a roller on an extension pole, carefully and evenly paint the rest of the ceiling, being sure not to over-saturate the roller while painting in small, careful ‘W’ shapes.
How to paint a ceiling without roller marks
Try to avoid going over sections too much before they are fully dry. Work in ‘W’ shaped motions, painting in rough squares as you move across the ceiling. However, you should aim for some overlap of around a quarter or a third on each squared section to make the edges as even as the centre parts.
Which direction to paint a ceiling
As in the previous question, work in squares. Visualise the ceiling broken down into lots of different squared-off sections, before working through them methodically. You may find it beneficial to start in the corner furthest away from the door and work backwards from there.
How to paint over water stains on the ceiling
The firs thing to address is whether there is an active problem with damp that would cause continued wet patches – if so, this potentially represents a much larger job in which case you should contact a plumber. Once the root cause of the stain is dealt with, you can move on to re-painting. To prepare the area, dilute bleach into warm water (roughly 1 part bleach to 3 parts water) and use that to clean the stain, which will cause it to fade. Clean with fresh water from a spray bottle, apply a stain-blocking primer over the area, and then you’re ready to paint as normal.
How to paint a ceiling with a roller
A roller is usually the most efficient way to paint a ceiling. A ladder is always advisable, but make your life even easier by acquiring an extension pole to attach the roller and easily extend your reach to the ceiling. Then, paint evenly using the ‘W’ and squares method mentioned above.
How to fix peeling paint on a ceiling
There are three broad steps to fixing a peeling ceiling. Firstly, use a putty knife to carefully scrape away the peeling area, before moving on to sanding the area with a higher grit sandpaper. Then, apply a specific patching compound to help repair the area. Once dry (with sufficient coats as per manufacturer instructions), prime and paint as normal.
How to paint a newly plastered ceiling
Fresh plaster is highly absorbent, and so needs a slightly different approach when painting. Once the plaster is 100% dry (use heaters and lots of ventilation to speed up the process) it needs what’s known as a mist coat. This usually consists of 3 parts emulsion to one part water, and should be applied thinly but evenly. Alternatively, a water-based primer will do a similar job – ultimately, the objective is to paint a layer (with a similar colour to your eventual top coat) for the plaster to absorb, giving you the ideal surface to then paint on normally.
How to cut in paint at the ceiling
Where walls and ceilings meet can pose problems for the home decorator, and cutting in effectively will help you overcome this. Your best friend here is masking tape (lots of it)and a medium-sized paintbrush. Mask over the wall right up to the join with the ceiling, and then make a couple of passes side to side with the brush, aiming to create a border to then fill in later with the roller.